How to access Journey
-
Open the app and tap on the Journey icon (
 ).
). -
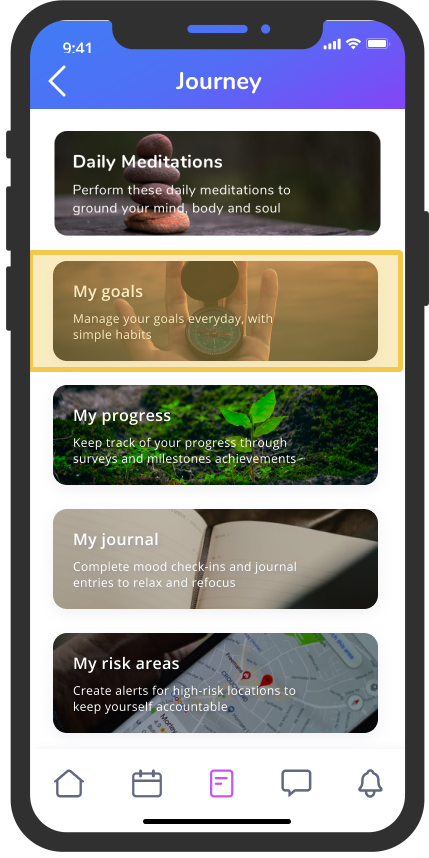
You have 4 tools at your disposal: My goals, My progress, My journal, and My risk areas.
-
Follow the guides below to learn how to get started on each tool.
TIP: There is no “right way” to go about your Journey – feel free to explore the tools in any order you like. Just remember, the more you engage with the app, the more you will get out of your recovery.
Using My goals
OVERVIEW
While it’s important to set goals for your recovery, developing long-lasting habits is just as key.
We designed My goals to be ambitious yet actionable, so that you can feel confident about your accomplishments every day while working toward something bigger.
There are 2 sections in My goals:
Today’s tasks: These are the daily tasks you will check off to work toward your goals.
All goals: These are the big goals you’ve set for yourself.
Create a new goal
-
From the Journey home screen, tap on My goals:
-
Tap on All goals, then tap on Create new button (
 ) to start creating a new goal:
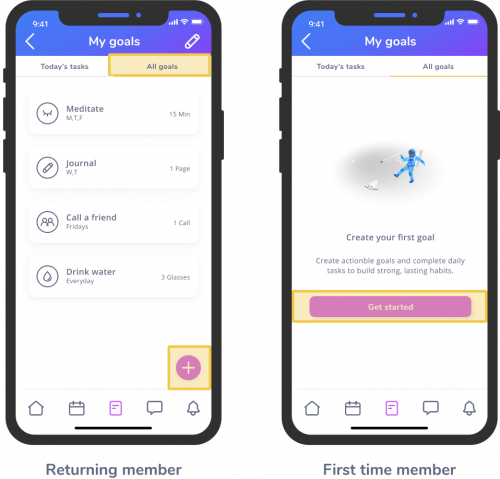
NOTE: If this is your perfect time creating a goal, tap on the Get started button instead.
- You’ll arrive at the Create goal screen which asks for your input:
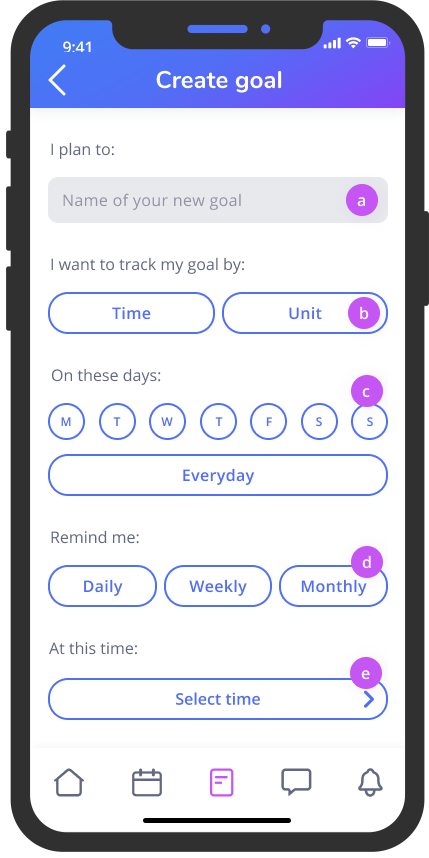
a. Come up with a simple name for your goal. Keep it short and don’t overthink it – it should be achievable but just a bit challenging.
b. Define how you want to track your goal. Choose Time to set a timed duration (i.e. 30 minutes, 1 hour). Choose Unit to set a custom unit of measure, like a page (of journaling), a glass (of water), or a call (to a friend).
c. Schedule your goal. Select the days you want to work on your goal. You can either selelect the days of the week you want to work on it, or select everyday (if you are amibitious!).
d. Choose a reminder interval (daily, weekly, monthly). This will let the app know when to send you push notifications about your goals.
e. Set a reminder time. You can also choose when you want to receive these notifications by tapping on Select time, and choosing a time of day.
NOTE: Selected items will appear solid, while unselected items will have a stroke outline.
- Once you are happy with your new goal settings, tap on Save:
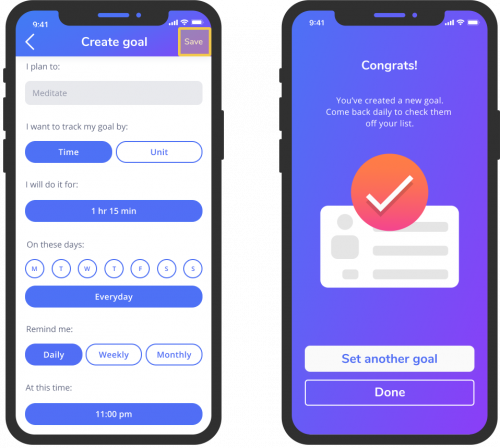
NOTE: “Remind me” and “at this time” are optional fields. You can save a goal without scheduling a reminder.
Edit or Delete a goal
-
From the Journey home screen, tap on My goals:
-
Tap on the Edit button (
 ) to start editing or deleting a goal.
 - When you see a grey arrow next to the goals, it means they are now editable:
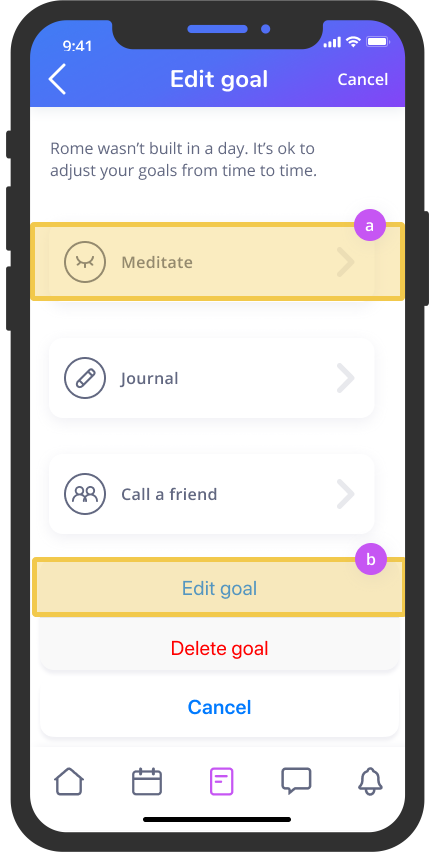
a. Tap on an individual goal to edit or delete it.
b. To Edit a goal, tap Edit goal.
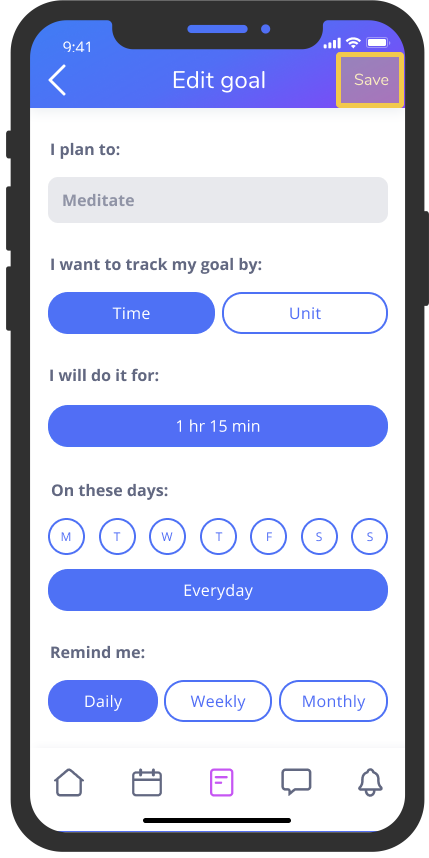
-
You can now update the details directly. Remember – selected items will appear solid, while unselected items will have a stroke outline.
-
Tap Save to save your edits:
-
To Delete a goal, follow Steps 1-3 above, then tap Delete goal.
NOTE: You might see a pop-up asking you to confirm deleting the goal. Tap Yes to complete deleting the goal, or Cancel to return to Edit goals.
Completing tasks
There are 2 ways to complete your tasks. directly from Home or from My goals > Today’s tasks.
Completing a task from Home
-
If you have goals already created, you should see a My tasks section half-way down your screen.
-
To complete a task, swipe left, and tap on the orange checkmark icon (
 ). The task will marked “complete” for the day:
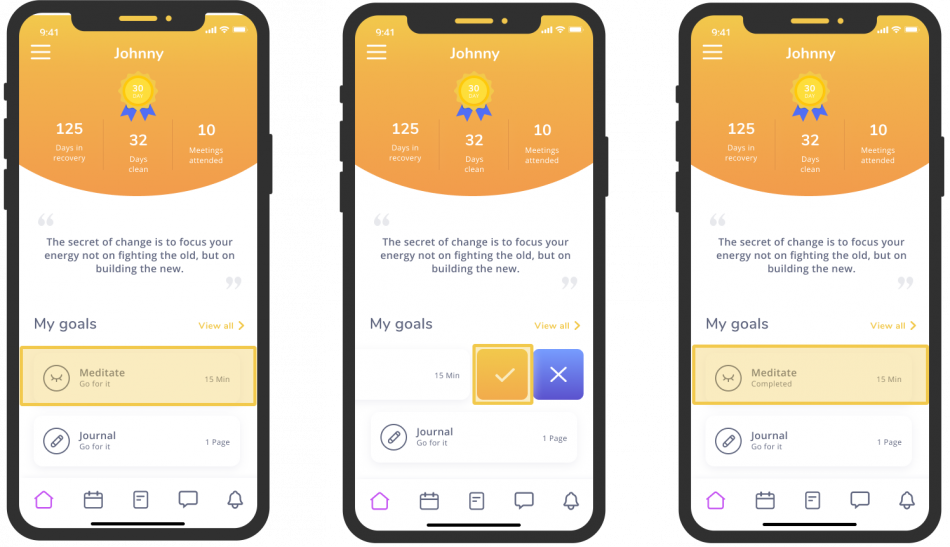
NOTE: You can tap on the blue x icon (
 ) to skip a task once a day. A skipped task can still be completed within a 24 hour window, so don’t stress if you can’t complete it right away.
 -
Come back each day to complete the tasks for that day.
NOTE: You will only see up to 2 tasks on Home. To see all your tasks (and goals) at once, tap View all to go to My goals where you will get a full picture of your goals and your completion status.
Completing a goal from My goals
-
From the Journey home screen, tap on My goals.
-
To complete a goal, swipe left, and tap on the orange checkmark icon (
). -
The goal counter will update and the goal will be marked “complete” for the day.
-
Once a goal is completed, it will stack beneath all active goals.
-
Come back each day to complete the goals you’ve set for that day.
NOTE: Tasks will appear on the days you chose to complete that goal (i.e. Creating a “Meditate” goal saying you will do it on Mondays and Wednesdays will only appear on those days) Don’t worry if you don’t see all your goals every day – you’re still on track!
Using My progress
Overview
Wondering how many badges you’ve acquired? Want to track how you’re feeling about your recovery? My progress is the home of Journal Trends, Milestones, and Survey results.
Access My progress from Home > Journey > My progress to see how far you’ve come in your journey, and gain confidence in your recovery: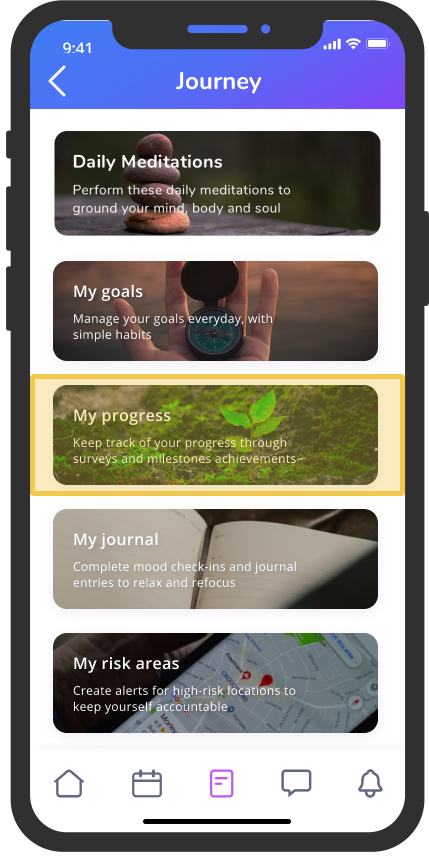
We’ve summarized what you can do with each widget to help you get started right away.
REVIEW JOURNAL TRENDS
When you complete your daily reflections in Journal, we visualize your data under Journal Trends so you can quickly see how you’re charting day-to-day. Here are the key feature elements: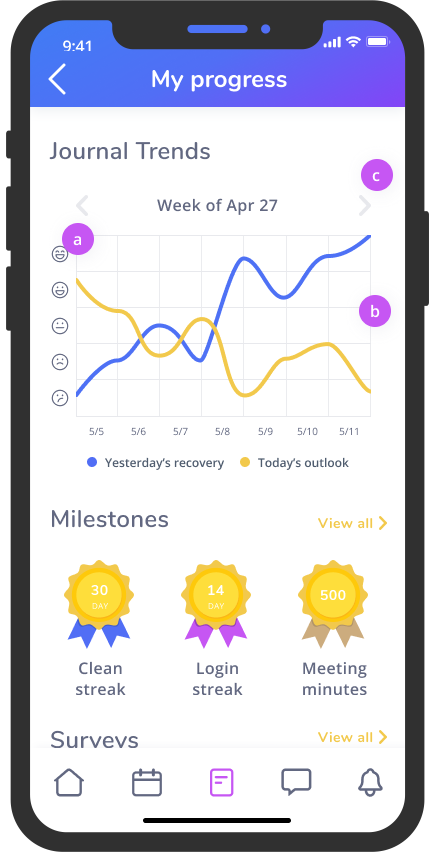
a. Emotion tracker: These are the same emoticons you would select while doing mood-checkins in Journal. When you rate your recovery or outlook, we plot down how you felt that day, then connect the lines to create a trend.
b. Progress chart: The yellow line represents how you feel about your outlook, and the blue line represents how you feel about your recovery.
c. View previous periods:To view past Journal Trends, tap on the back icon (<). To go back to the future, tap on the forward icon (>).
NOTE: Back or forward icons only appear if there’s data available.
REVIEW YOUR MILESTONES
When you complete milestones large or small, we will showcase them under Milestones. Keep engaging with the app to earn milestones, and unlock rewards.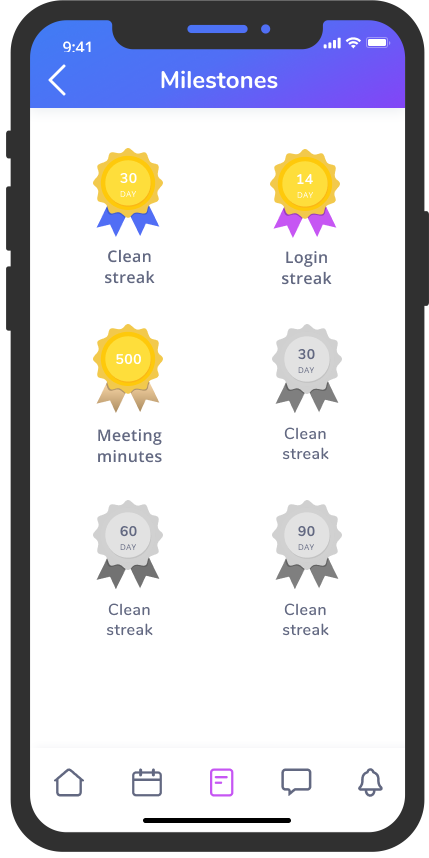
Milestones Q&A
Q: What kind of badges can I get?
A: The table below details all current milestones that can be reached:
|
|
|
| Login streak | how many consecutive days you logged into the app |
| Meetings attended | how many cumulative meetings you attended via the app |
| Daily goals streak | how many consecutive days you completed at least one daily goal |
| Goals created | how many goals you created in “goals” |
| Entries streak | how many consecutive days you completed a journal |
| Positive entries streak | how many consecutive days you completed a journal with an emoticon rating above 3 |
| Risk areas created | how many risk areas you created in “risk areas” |
| Risk areas avoided | how many consecutive days you successfully avoided your risk areas |
Q: What can I do with badges?
A: Badges are currently for collection only, but we have plans to evolve the Milestones experience to be more meaningful to you. For example, we’re working on designing a reward system that will allow you to convert badges to giftcards, memberships, and discounts – all the more reason to continue using HereNOW.
Q: Will I lose my badges if I relapse?
A: No. Once you’ve earned a badge, it will stay with you forever. We believe in all kinds of achievements, and that one mistake doesn’t undo all the amazing results you’ve accomplished before.
Complete outstanding surveys
Forgot to complete last week’s survey right after your meeting? No problem – you can easily pick up where you left off. Active surveys live in My progress: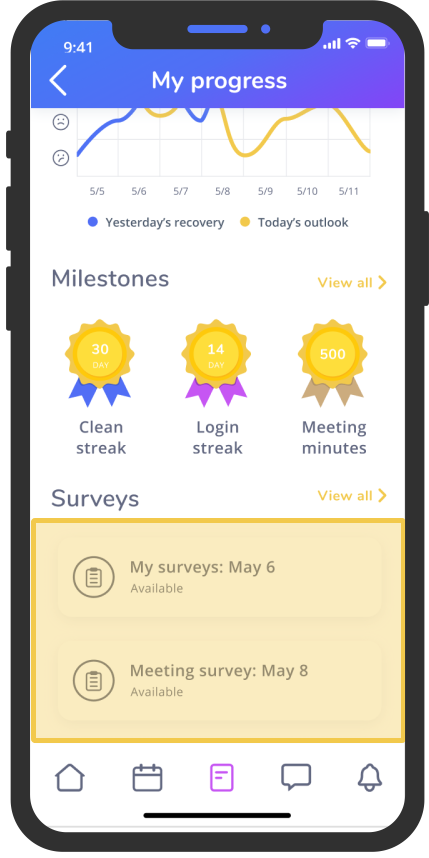
Come back anytime within the 7-day window to start your surveys.
Using My Journal
You can complete mood check-ins and journal entries to relax and refocus using the Journal tool.
There are 2 ways to create a journal entry: from Daily Meditations, or from Journey > My journal: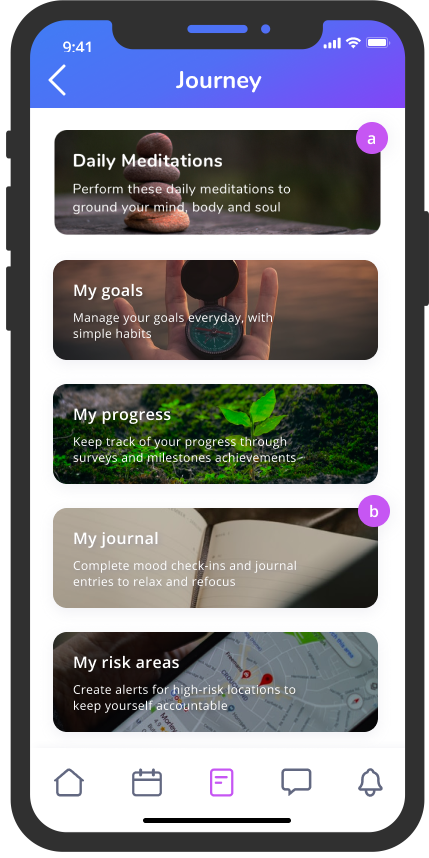
Create a journal entry from daily meditations
-
From Journey, tap on Daily meditations
-
Tap on the meditation for the day. Read and reflect.
- When you are ready, tap on Continue to Journal.
Create a journal entry from Journey
-
From Journey, tap on My journal.
-
Select the available journal entry you want to complete:
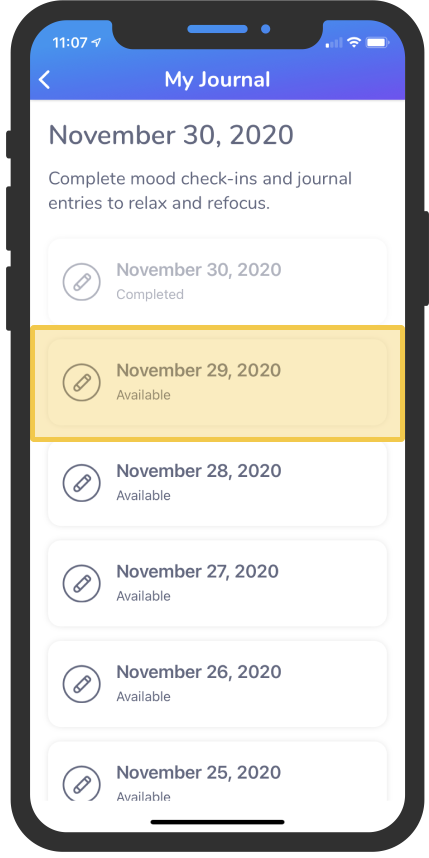
TIP: We suggest creating a daily meditation and journaling routine. New Journals are added at the end of each 24 hour day to help you get into a healthy habit. -
Answer the mood check-in questions on the next few screens to complete your entry:
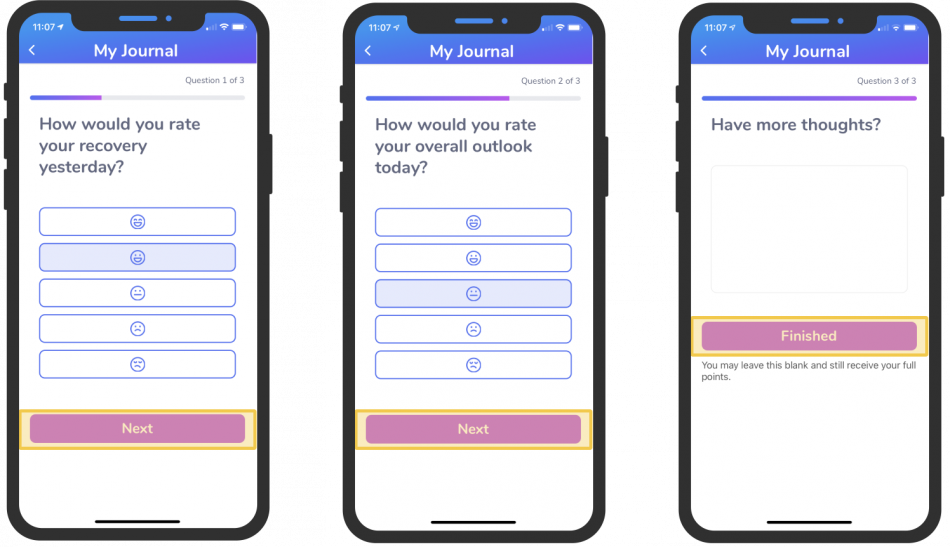
NOTE: Mood check-in questions are mandatory, whereas the open text questions are optional.
-
Tap on Finish to submit your entry.
Edit or delete a journal entry
-
From Journey, tap on My journal.
-
Select the completed journal entry you want to edit or delete.
-
Tap on the Edit icon (
). -
tap Edit entry to edit it. You can now tap on the emoticons to update your mood check-in responses, or tap on what you wrote to edit the entry.
-
Tap Delete entry to delete it. You may see a confirmation popup asking if you’re sure. Tap Yes to confirm deleting the entry.
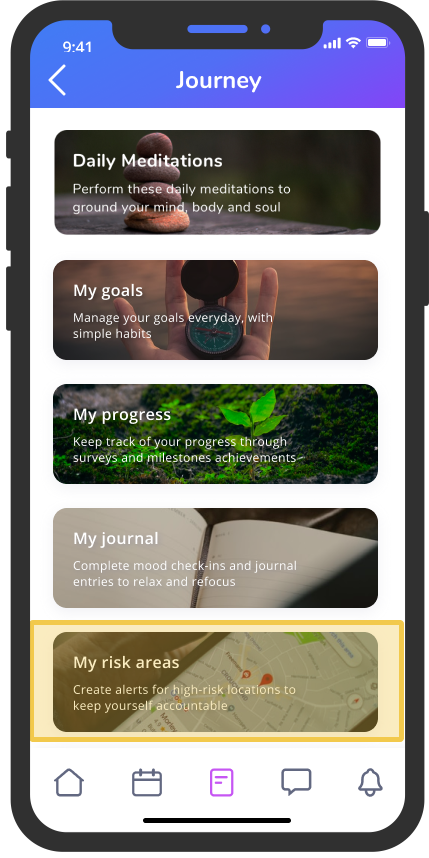
Using My risk areas
You can use My risk areas to create and customize alerts for high-risk locations. It’s a great way to keep yourself accountable and stay connected with your care provider so you can stay focused on your path.
add a new risk area
-
From Journey, tap on My risk areas:
-
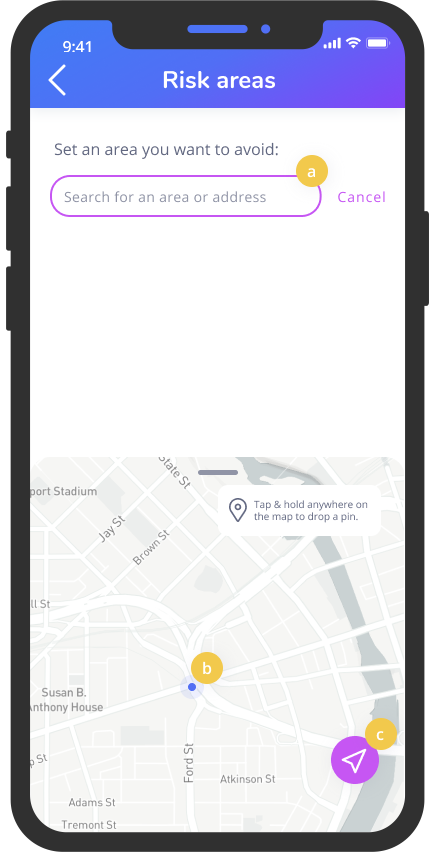
Tap on the Add new button (
). -
You can now set an area you want to avoid in 1 of 3 ways: a. Search for an address or area, b. tap & hold anywhere on the map to drop a pin, or c. select current location:
-
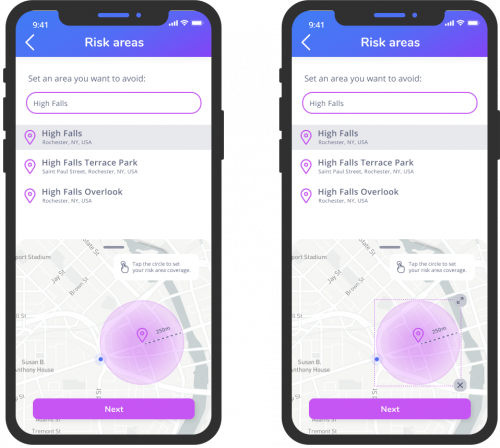
Once you’ve selected an area, you will see a circle indicating the area you’ve selected on the map:
-
Tap to reveal handles around the selected area. Drag the handles to adjust the risk area coverage to your needs.
-
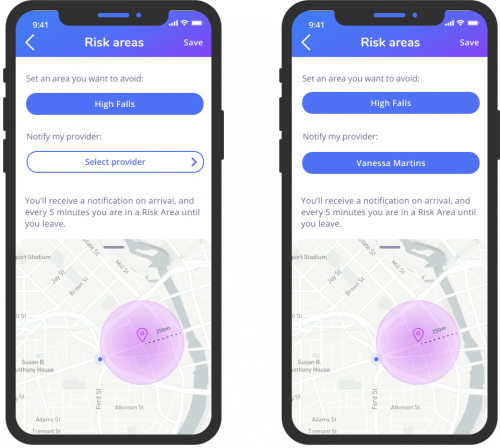
Once you are happy with the area setting, tap Next. Select your provider.
-
Tap Save.
Edit or delete a risk area
-
From Journey, tap on My risk areas.
-
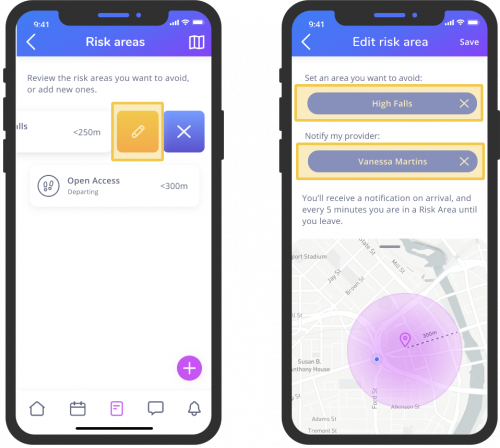
Tap or swipe left on a risk area to reveal the Edit and Delete buttons.
-
To edit risk area settings: Tap the Edit icon (
) to edit. -
Tap on X next to your current setting (either the area or provider) to edit the details.
-
Tap Save to update your new risk area settings.
-
To delete a risk area: Tap the X icon (
) to delete.
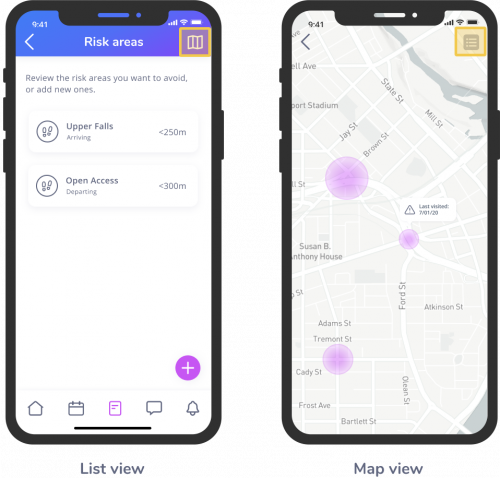
Customize my view
By default, you will see your risk areas in List view. To see it in Map view, simply tap on the map icon from the list view: